Take Better Product Photos With These DSLR Settings
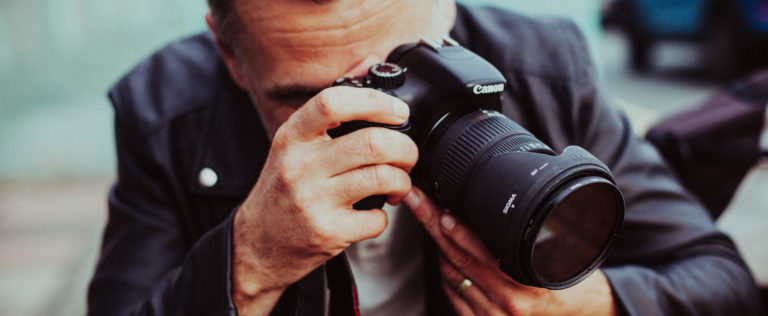
If you have a DSLR camera and you’ve started taking product photos, you might want to step up your game. Moving from the default camera settings to customized settings on your DSLR will allow you to focus and enhance whatever is most visually important about your products. Your instruction manual will show you where each setting is on your particular camera.
RAW Format
Out of the box your DSLR will shoot photos in JPEG format. The next level of taking photos on your DSLR means moving from JPEG to RAW images. RAW images are captured exactly the way you and your camera see them. No automatic adjustments, no file compression. These images are recorded at the highest image size possible, based on the sensor size of your DSLR. RAW images are more effective to edit in programs like Photoshop, Lightroom, iPhoto, or Aperture because you have the ability to work with an image that is, essentially, raw material. RAW images contain all of the information you need to make any and all adjustments necessary to produce the exact image you want. All our recommended DSLRs give you the option to choose the RAW format.
Set Your Aperture
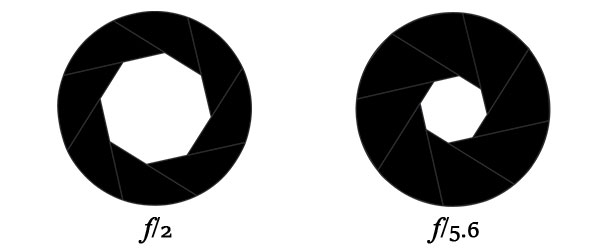
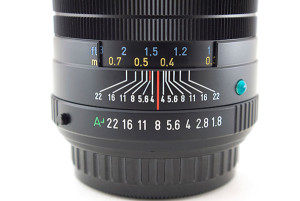
The aperture of a DSLR is the size of the opening of the lens that lets light pass through to the camera’s sensor. The aperture is adjustable, and is often also referred to as the “f/stop.” The smaller the aperture value for f/stop number, the larger the aperture. Simply put, an aperture of f2 lets in a massive amount of light, while an f/stop of f22 lets in very little light.
In our recommended DSLRs, changing the aperture is generally an easy thing to do. Mostly it involves setting the camera’s mode wheel to ‘A’ or ‘Av.’ Once that’s done, adjusting the aperture requires turning another knob or wheel to the exact aperture you’d like to use. (Your instruction manual will have directions as to how you can change your f/stop on your particular model.)
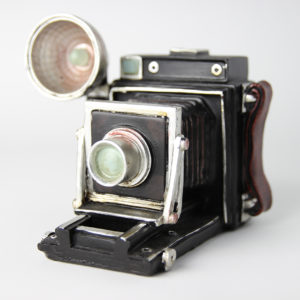
The size of your aperture will affect the final outcome of your image. A very large aperture may cause the background to appear blurry. A very small aperture may cause your image to be too dark. With that in mind, it’s always a good idea to shoot some practice shots using multiple aperture values to find the one that balances crispness and light for your product photos.
Adjust Shutter Speed
Shutter speed is how fast your camera opens to let light in and then closes again. When shooting in aperture mode, the camera will, generally, set the shutter speed for you. Change the aperture again, and you change the shutter speed. They also work conversely. If you set your camera to Shutter Priority mode, the mode that allows you to set the shutter speed, the camera will automatically set the aperture for you. What really matters here is this: if you are going to hand hold the camera for your images, make sure the shutter speed is no slower than 1/60th of a second.

Choose Your ISO
ISO, or International Standard Output, is a measure of the camera’s sensitivity to light. In the days of physical film cameras, it was called “film speed.” Set your ISO to a low rate, because otherwise images can be really grainy. Start with a setting of 100. If your images need to be brighter, adjust the setting to 200 or 400.

Keep White Balance Automatic
“White balance” is the process of removing color from a photo. Fluorescent or even normal sunlight can really affect your white backgrounds. Your best choice to start is to choose the Automatic setting for white balance on your DSLR. This is one setting where the DSLR will do the work for you.

Adjust Your Exposure Compensation
Exposure refers to the amount of light allowed to pass through to your camera. With all the settings above, you are setting your exposure. If you have a camera that offers additional exposure compensation, try setting your exposure to +1 or +1.5. Not all cameras have the ability to make this adjustment and it’s a best practice to use it as a final touch rather than a quick fix.
Test Your Settings
Different combinations of an f/stop, shutter speed, and ISO will yield different results, and no one setting will be the ultimate decision point for how you take your pictures. You will need to test and tweak each of these settings to get the right mood and setting for your photos.
Fix It In Post
Particularly with product shots on white backgrounds, there will likely be a significant amount of retouching to do. It’s important not to skimp on this. After the hard work you’ve done to choose a camera and learn your advanced camera settings, retouching your photos is the final step that makes your products look professional and appealing. Try out programs like Adobe Lightroom, Adobe Photoshop to make your images look pristine. There are free editing softwares out there like GIMP, but most times it’s worth the investment to go the Adobe route for usability and power.
Taking your own images is a lot of work, but you will be proud when the product sells. And, if you, in the future, decide to outsource the whole photo shoot, you will have a greater appreciation for the time, effort and skill that go into the photo budget you eventually approve.
Sell Online?
If you’re an eCommerce seller, great product photos are key to getting sales and reducing your returns. A nice touch to your customer’s online shopping experience might be to incorporate your product photos beyond checkout. With a shipping software like ShipStation, you can promote your brand and wow your customers with additional places where your product photos can live like a Branded Tracking Page, your shipping confirmation emails, your packing slips, and more. If you want to use your product photos to their best advantage and save time and money when shipping your products, try out ShipStation free for thirty days.


